Built in fridge install

typically fridge install is fairly easy, get it delivered and plug it in.  In this example of doing it the hard way we needed seven different construction dudes to hook up the fridge. 

2 delivery guys  

1 plumber to connect the water line

2 cabinet installers to make the trims  

2 builders to assemble the fridge and haul away the garbage.  


The finished install  

The finished install  

IMAGE.JPG

The space required to open these big fridge/freezer combo units is considerable.   

Appliance install

with appliance install well underway at the Richmond project we are advancing nicely to interior completion.  Next up will be mirrors and glass work plus the final plumbing and water heater.  


IMAGE.JPG

Managing humidity at the finishing stage

Arid conditions in the calgary winter air have some serious consequences for the finishing stage of the project.  This is a stark contrast to a previous post where the issue was too much humidity in the attic causing frost and melt damage.  So you have have a house that has too much humidity damaging the attic, and too little humidity inside damaging the wood products.  This year seems to have been particularly bad for both conditions, at the same time.  Such is the cursed life of the home builder who may be trying to add humidity to the interior while fighting to vent humidity from the attic.   

The ambient humidity in calgary air is too low for hardwood flooring, which is entirely produced in more temperate regions.  Once it is installed in calgary, even after being conditioned to the space, it may shrink.  The tactic we are using now is to deploy large humidifiers and leave out gauges to try and get the humidity to at least 40%.  Note that at this time we don’t have the furnace humidifier installed, so the furnace acts to dehumidify the house.   


IMAGE.JPG

This large unit can run for 36 hours and will pump 6 gallons of water into the air.  That really works to get the humidity up to a higher level inside.    


IMAGE.JPG

This house is being left warm because the painters are working.  They need it warm to dry the paint.  We want humidity over 40% so the gauge is helpful.   

Digging out the kitchen from a layer of dust and plastic

We had pur favourite crew of cleaners arrive to do another much needed pre clean. Far from a detail job but we can now unveil a lot of the finished work from underneath the plastic and dust.  Many items left to do but we are making steady progress (on the inside the exterior remains frozen).   


IMAGE.JPG

Finishing continued

touchups, handrails, templating for showers and mirrors, baseboard and bath hardware and final grouting on some remaining tile is underway this week, or now complete.  Quite a lot of minor stuff and a lot of dust, as per the norm.  The real laggard now is exterior work that can’t be done until we get to spring.  

IMAGE.JPG

Fireplace is grouted and just needs a top piece.   

Attic rain, revisited

Every year, around peak winter, there is a story in the media regarding freezing related damage to houses in Calgary. Last year, with the heavy snow pack, it was ice damning on shingles leading to leaks.  This year, due to the hideous month of continuous unseasonable cold (coldest February in recent history with average temperate almost -18C), it is so called ‘attic rain’.  https://www.cbc.ca/news/canada/calgary/calgary-attic-rain-frost-cold-weather-1.5036581

I didn’t particularly like this article.  First of all, attic rain is a bad name, because it isn’t a form of precipitation or weather, it is the sudden thaw of frost that was trapped in the attic that damages the finished interior space below.  Many serious issues can be caused by this moisture that we don’t need to discuss here.  Another conclusion drawn by the article is something I don’t agree with, that is, the only way to fix it is to somehow ‘reseal’ the vapour barrier in the ceiling so that humidity from the house can’t escape into the attic.  I believe that no matter how well the house is built, some humidity will make its way into the attic.  The natural forces are very strong that draw moist 30 Celsius shower water/air mixture from a bathroom  upward into a - 30 Celsius attic cavity.  That is a 60 Celsius gradient of temperature across a thin layer of poly, drywall and loose fill insulation.  If we are going to use this conventional technique of building, and we will for the foreseeable future continue to, instead of far superior and more costly techniques and materials, we just need to mitigate this attic issue so it doesn’t become harmful.  Each type of building process has some negative aspect to it, and the wood framing style of building common in Calgary has many advantages  vs other forms of building, namely cost being #1.

If the conclusion drawn by the CBC article was true (sealing of vapour barrier is needed), then my own methods of fixing this issue without tackling the ceiling vapour barrier would not have worked.  I built a recent property and noted that the ceiling poly was done carefully, or at least as well as could be done outside of a laboratory, without rips or holes, penetrations that were not sealed, or lack of backing on the joints.  I examined it carefully as leakage into the attic of humidity is a known issue and I don’t want to repeat the mistakes of others.  I also installed very expensive and effective roof vents, the max brand variety, that cost over $100 each, and each unit received 2, more then enough vent capacity.  Despite these efforts, some frosting in the attic was observed during the severe cold (none was observed at routine cold temperature).  The issue was caused (to me, conclusively), by lack of enough air intake into the ventilated roof.  The lack of pathways to vent the roof properly is largely due to city rules about fire spread among buildings, so that in some areas where the roof needs to have perforated soffit to aid in venting, it isn’t allowed.  One simple solution is to add more ventilated soffit the year after a house is finished if attic frosting is becoming an issue.  If that actually works, then I guess you can blame the building code rules for creating the problem in the first place.  Your house may not burn down when your neighbour has a fire, but if it is full of mold, that is a serious problem and hard to fix.  I’d accept a little more risk of a fire that may never happen, then endure the certainty of a roof full of mold and moisture damage.

An even more effective option, if adding ventilated soffit is not working, is to cut in a louvred shutter on the wall, near the roof, and positioned over the top of the loose fill insulation in the attic.  This, in my experience, is what allows enough air to enter the attic to vent it. Most often, the issue is not venting, or allowing the humidity to escape, it is a shortage of input of dry, cold, fresh air.  Once the volume of incoming air is increased, the issue of frosting resolves itself.  Of course, adding these louvered vents isn’t easy in a finished building, particularly a stucco building.  Vents can be the cheap plastic variety sold everywhere, or custom sized and colour matched metal models.  I have used both and both are effective.   

Here is a photo taken from an attic on a recent build of mine taken February 7 2019.  I thought at the time ventilation was more than adequate, however the roof had some low slope areas with low head height inside, and I was concerned those areas may not be frost free.  Sure enough after a couple weeks of super cold weather, I toured the attic and saw more frost than I deemed acceptable, and it was spread fairly consistently over a broad area. Note that some minor frost is likely ok, as it warms, the frost will likely sublimate and disappear out the vents (provided they are not covered by snow and blocked, another common issue).

Note each roof shingle nail collects a bead of sweat from the humidity and then freezes. Over time these could form a mighty stalactite, and when this melts it will definitely leak through the drywall below.  The worst case scenario is definitely no…

Note each roof shingle nail collects a bead of sweat from the humidity and then freezes. Over time these could form a mighty stalactite, and when this melts it will definitely leak through the drywall below. The worst case scenario is definitely not shown here in this image, this would be minor frost buildup.

After reviewing the forecast of cold for the remainder of the week, (little did we know it would be cold for the next month almost continuously without a chinook) it seemed that this situation could worsen.  It is hard to predict how much additional frost would accumulate, and if this would become a problem later.  The decision was made to take some action.  A two part strategy was used, the first was to change some soffit to ventilated from non-vented, and the second was to cut in a gable wall vent.  Lacking time to get a custom made vent, I just purchased the super cheap kind from Rona.  The custom kind are much nicer but these were to be installed in a hard to see area.

These are crude yet very effective wall vents to add to an attic that is lacking intake but has enough exhaust.

These are crude yet very effective wall vents to add to an attic that is lacking intake but has enough exhaust.

Here is recent photo of the same attic following ventilation being added, and was taken after overnight lows approached -30 Celsius.  Note the roof is completely dry and frost free.  No evidence remains of the frost that was there a few weeks previo…

Here is recent photo of the same attic following ventilation being added, and was taken after overnight lows approached -30 Celsius. Note the roof is completely dry and frost free. No evidence remains of the frost that was there a few weeks previously. The bright portion of the photo on the wall is a louvered gable vent that provides the bulk of the fresh air intake to this part of the roof, shown from the inside.

This concludes my observations on the Calgary ‘attic rain’ problem.  Builders are wise to construct simple roof shapes that offer a predictable means of adding intake and exhaust, and prevent ice jams during heavy snow years.  During the siding phase of the building, it is wise to, at low to little cost, add a wall vent (or two). This tiny bit of insurance may save a massive amount of trouble later.  There is no less expensive way to build a house than a wood truss roof with a vented cavity, this style of construction is totally mechanized and perfected by local suppliers with thousands of jobs worth of experience, and it works well if suitable precautions are taken to manage our extreme weather.  For 95% of the winter season, or even an entire winter, inadequate ventilation of the roof may not be an issue, but when you do have that long cold stretch will be when you are least able to manage the problem.  There have been some roofs built over the years, largely inner city multi family projects, with absolutely terrible ventilation performance. I am not sure how these low slope, inaccessible cavity roofs have been repaired.  Costs could run into the 10’s of thousands to fix water damage and the performance of the roof, yet these problems could be avoided simply with a $20 vented shutter from Rona…

Railing install

The railing carpenter is back on site to install the railings.  Further progress is slowing now as we deal with the final details.  


IMAGE.JPG

Ready to template for the glass  

Finishing progress

Following a brief but much appreciated trip away from the arctic conditions I returned to much shoveling and two per day blizzards.  Also some construction progress was planned and underway while I was gone.  

Next up is more kitchen trimming and lockout type of tasks, closet rods and faucet trims.  One we get to appliances then we are really close to completion.   


IMAGE.JPG

The Richmond semi has some nice hardware and we are finally getting it put in. 

Courtyard33 appeal fails to derail the project - a big win for Marda Loop redevelopment!

Excellent news from the Calgary Subdivision and Development Appeal Board. Here is a link to the outcome of the appeal

https://www.canlii.org/en/ab/absdab/doc/2018/2018cgysdab174/2018cgysdab174.html

Basically the appeal was brought forth for a variety of reasons, mainly minor issues that have little bearing on the success of the project, such as a perceived shortage of bike stalls, or balconies too small. Plus of course the consultation process was not acceptable to the appellant. Where have we heard this before? Is rndsqr to scrap a huge project just to placate a neighbour who doesn’t like their designs, effectively give one person a veto? It is amazing how some individuals consider their own personal needs (or wants) to supersede those of a project that will house over 50 families and businesses, and employ many people during and after construction (during a painful recession even). Some of the appeal doesn’t even have any bearing on a person who doesn’t own a unit in the building. I think the buyers can decide if the balconies are suitable rather than a person who has zero likelihood of living in the building. The buyers don’t need a local NIMBY type to decide for them how they should live, especially in a building where the investment in the public amenity is so large, it needs quite a few condo fee paying buyers to fund and maintain those spaces. Hopefully not too much money or time was wasted on dealing with the appeal. Even better would be to get the appellant to pay the costs of the builder incurred in preparing a legal defence.

Here are a few snapshots of the decision report.

courtyard33 p12.png
2018cgysdab174 courtyard 33 pg34_Page_3.jpg

Hardwood nosing install

With some unexpected delays due to the Chinese New Year happening at the same week we needed the crew we’ve got little progress to report. One of our most reliable contractors is on site installing the hardwood stairs.  At least he’s got the houses to himself and nobody walking around on the stairs that are being finished.  If the deep freeze passes with the holiday then next week will be more productive.   


IMAGE.JPG

The painstaking process of cladding the stairs is underway.   

Countertop install

My regular supplier and fabricator of the stone countertops installed the first unit at the Richmond project.  With unit one ready now for hardwood flooring we can start to catch up the finish work on the second side. Having the counters in allows the tile and plumbing work to be completed as well.  This project features an impressive waterfall island with a large leathered granite surface. 


IMAGE.JPG

Large mitre cuts in the stone.  

Tiling begins

Last week we worked on a lot of not particularly photogenic logistical stuff and played around with the radon abatement project.  This week we are back at the Richmond project.  Tiling of the showers is now underway and the first countertop install is scheduled.  We’ve got drywall touchups done and the painter booked on the remaining house.  After this wraps up we will be into hardwood and the final finishing tasks.  I’m also at work planning my next few builds, focusing mostly on a semi d plan that is 100% new from our ongoing collaboration with the design team.


IMAGE.JPG

Fun with radon part 3, the eviction.

It appears my battle to evict the evil radon from the Killarney residence was a success. After a 48 hour resample period, levels have dropped from the 2018 lab tested 248 to 14 Bq/m3. Despite the favourable outcome, some issues remain outstanding and unresolved.     

1.  The 90 day sample is highly accurate yet it reported a significant margin of error along with the analysis, + or - 34 Bq/m3. That margin is much wider than the post abatement result of 14 Bq/m3. I don’t believe my digital device is capable of greater accuracy after 48 hours than the error margin of a 90 day test performed in a lab, nor is a result of negative 20 Bq/m3 even possible. So the sensitivity of the instrument is questionable (but not a reason not to purchase the equipment and do the install).

2.  The volume of flow being discharged out the 4 inch pipe is higher than I would like.  I’m concerned that my heated slab will be having the heat sucked out of it by the depressurization.   That will lose a lot of heat energy over a winter.  The heat loss is beneath the slab insulation (meaning we are pulling the heat out of the earth primarily) but still a concern. 

3.  I wonder about my attached neighbours house. She may be getting a fair bit of her slab depressurized as well due to the footing interconnection. If so one abatement may do the job of two abatement and that’s a nice bonus (because now I won’t have to do hers!). Sampling will need to be done in her side to confirm.   

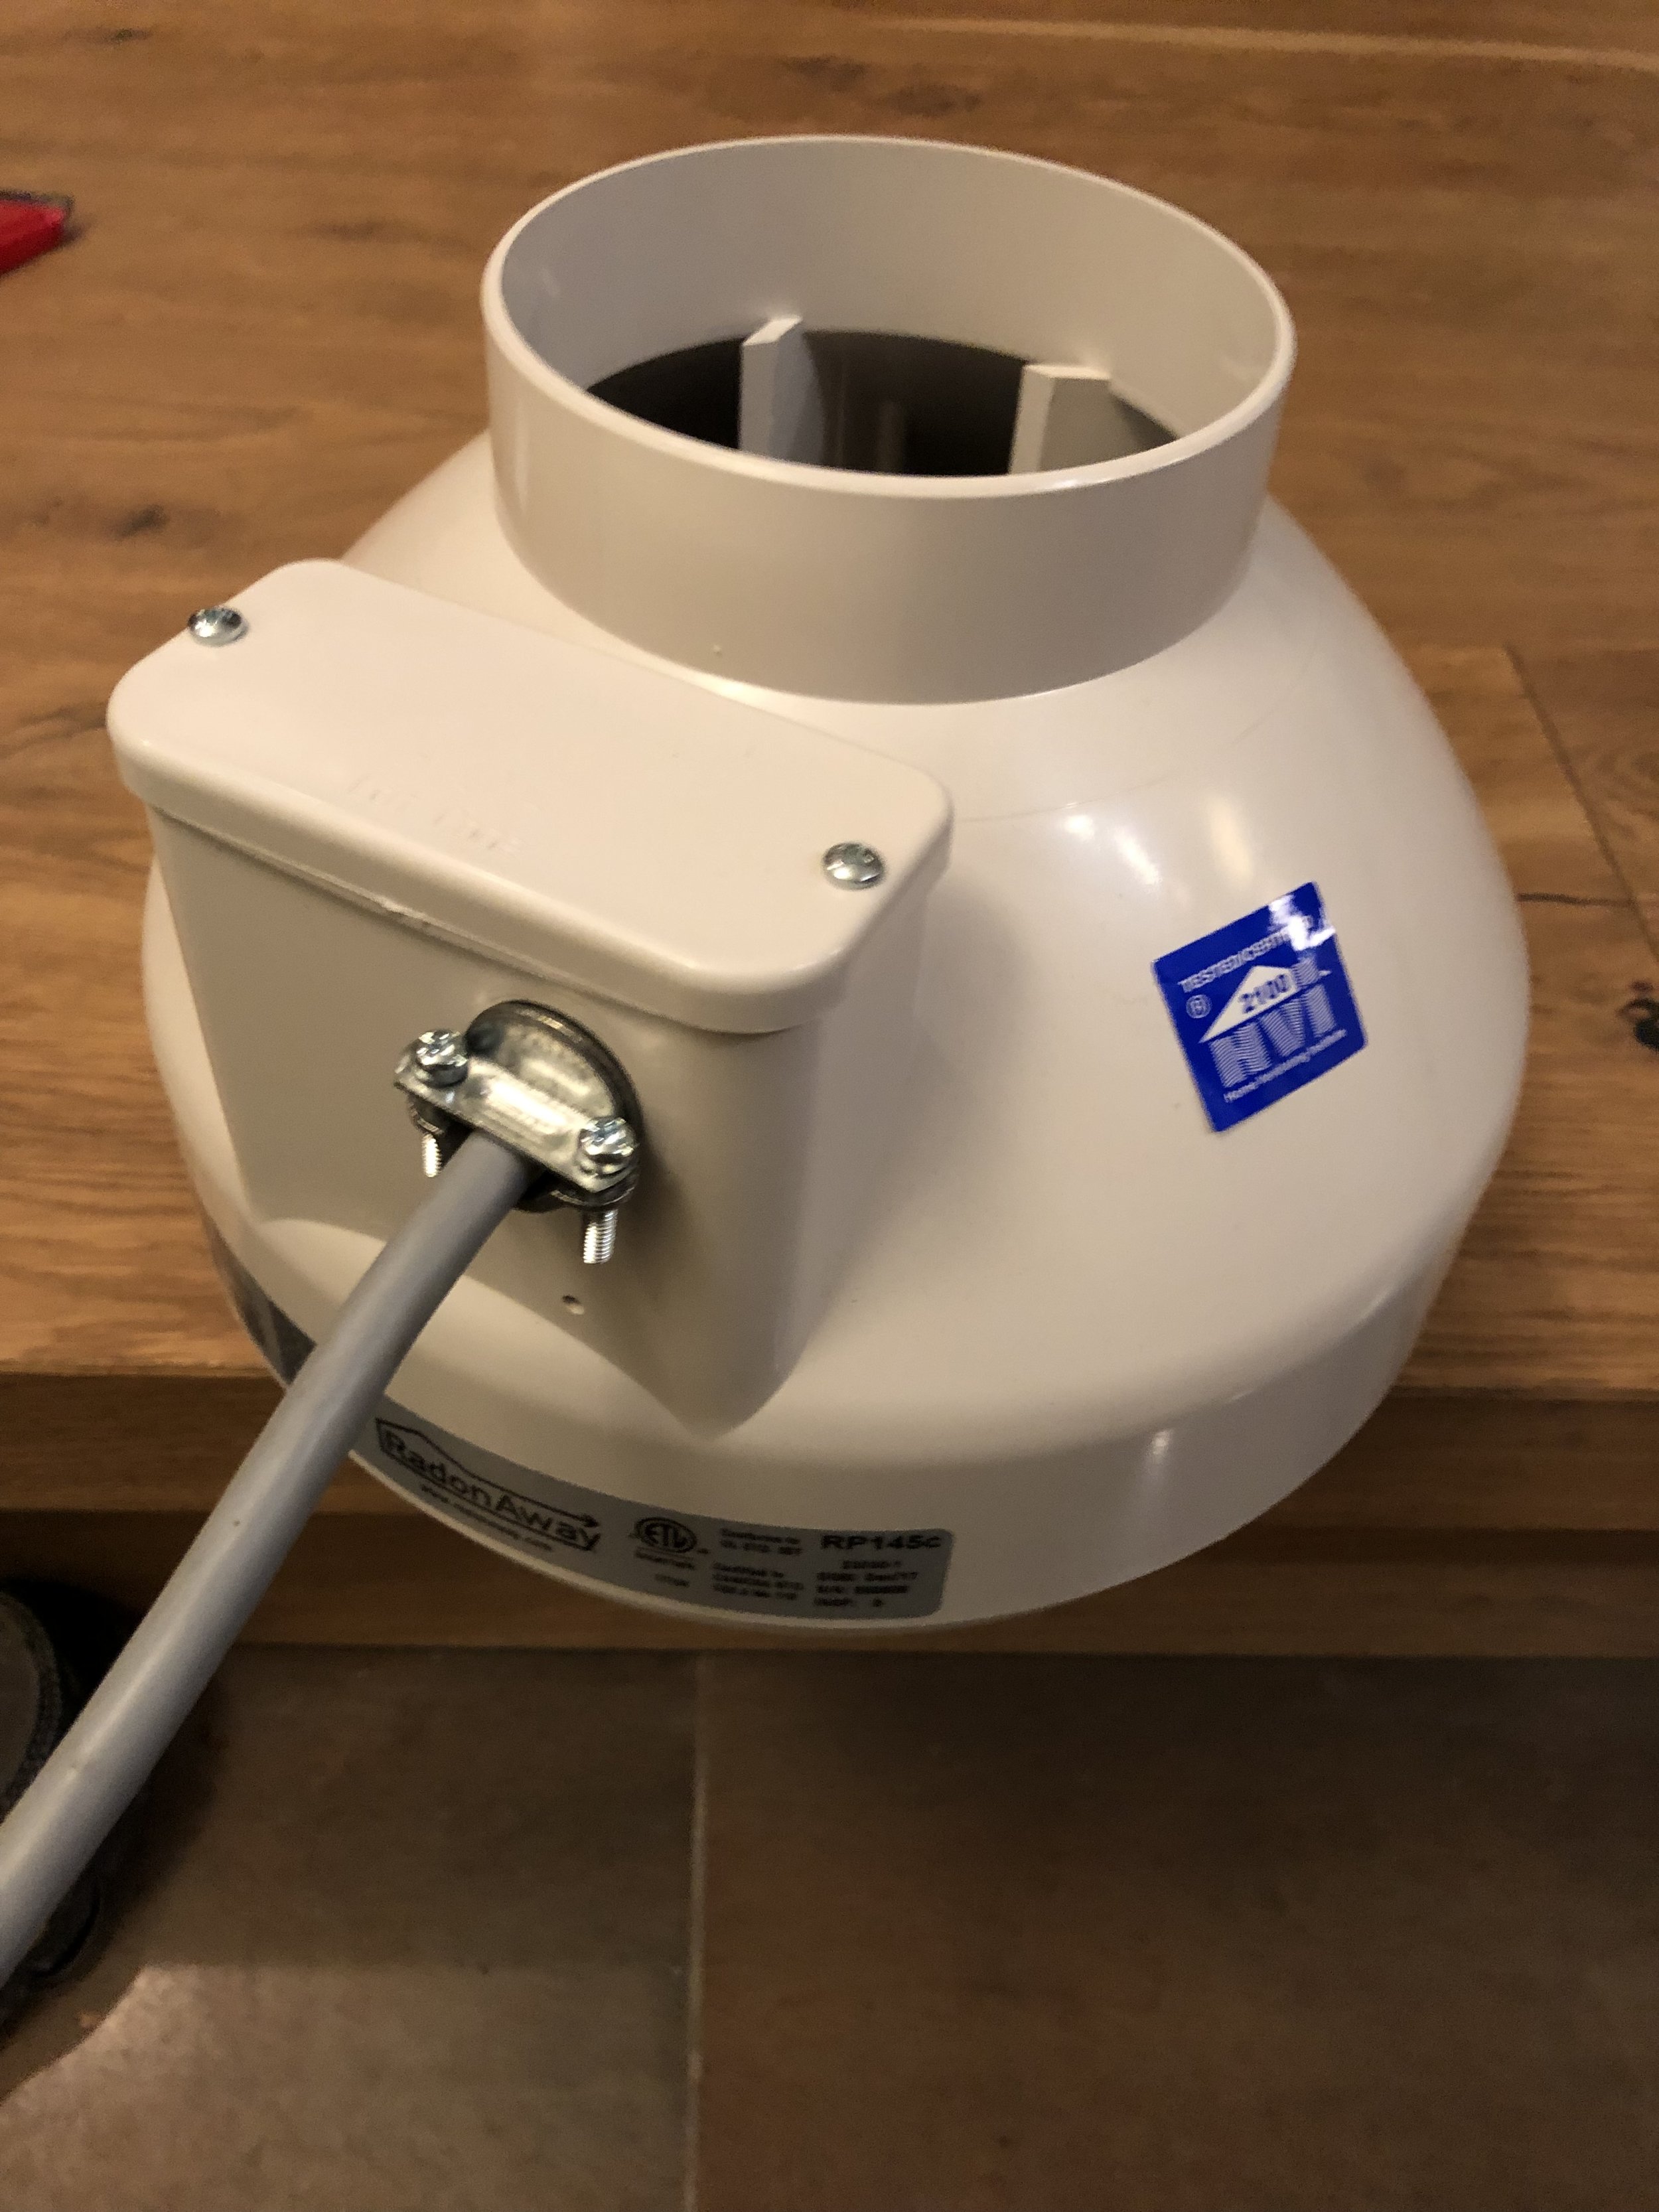
4. I asked a trained installer to inspect photos of my system. They reported back the abs pipe we used above the fan isn’t allowed.  I think this is nonsense. If the abs pipe is ok to use for underground sewage it can blow out radioactive particles.  Also in the new homes we build we use 4 inch abs beneath the slab as the radon roughin. So it’s good enough below the slab but not ok above the slab?  PVC is much more expensive pipe than cellcore abs.  Two lengths were needed, but that stuff adds up quickly for long runs with many fittings (we didn’t have a long run or lots of fittings but I still don’t see the point of pvc).     

5. Lets throw in a criticism of the government to conclude the post. It is doing a great job of getting the word out about radon.  Yet it doesn’t post a material list and detailed instructions for homeowners.  It would rather hand out light bulbs than subsidize abatement kits for the most at risk families.  I think any home over some high number such as 600 Bq/m3 should get a free fan.  If the government can afford millions of flu shots it could bulk order 100k radon fans as well, and not from amazon.  Right from the factory.  Too many families that should deal with radon won’t, mostly because of the high cost.    

So that wraps up this expirement with diy abatement.  In a future post I will describe the cost in detail.  Figure on an all in cost of 500$ plus some labour from my undisclosed helper.

Here is my post abatement score. Hopefully this is accurate and we’ve succeeded in evicting radon and earned a higher score with spousal happiness.  

Here is my post abatement score. Hopefully this is accurate and we’ve succeeded in evicting radon and earned a higher score with spousal happiness.  

Fun with radon, part 2, the unhappy husband

This post should be titled the ‘trouble with small business cost and pricing structure in Calgary’.  Have you ever encountered a business in Calgary that’d rather take nothing than earn a reasonable profit for a quick in and out job, but less than whatever predetermined formula (high margin) it established for itself?  That seems to describe the radon profession in Calgary to a ‘T’.  Too many small businesses are longing for the heady days of the boom years when a customer would just ask how much and accept whatever sum was requested and hand over the credit card. I think those days are over and not returning.  

After a second $2300 quote for radon abatement (have these guys got together to set prices or is this service really worth that sum?) it became obvious that if it was going to be done, it’d be installed the hard and cheap way (by me).   The rationale for why the fee was so high was never credible.  The first operator appeared to have been using a commission sales guy who’s job was to get into as many customers homes as possible.  He’d get a contract and then sell it off to an install crew and pocket the difference.  Since I don’t need middleman that aren’t wearing a tool belt that didn’t work for me.  Second crew had dubious reasons like a) had to pay for insurance, and b) training and certification cost money too, thus the fee was warranted. My offer to divide those costs by 365 and see what that amounted to per day, which I’d double, a 100% ROI in their fixed cost didn’t get me a deal.  I reviewed the total education component necessary to be certified and it was $2500 plus annual dues.  Not much in business.  My suggestion that home builders have larger insurance bills and overhead than radon guys didn’t gain much leverage in the negotiations either.

My network of contacts in this industry is large and from this I can get a second opinion on cost of service. I contacted a renovator in Colorado who mentioned he’d included an abatement on a house as a deal sweetener.  He said they used to pay $1200 but recently had located a contractor at $900.  I knew this before my second quote was collected. I tried to leverage this into a lower price than $2300, but still more than $1200 converted from USD. If someone in Colorado can do it for $900, the surely someone in Calgary can make a nice living at $1500.  

And then amazon offered free shipping of all the key supplies needed to my do my job, plus an upgrade of a digital monitor for less than $500.  I’d purchase help with the ducting and the pipe supplies locally and with a little DIY we’d be abated.  Is it really that simple?  In the next post, fun with radon part 3, the install (eviction) tale will be told. 


IMAGE.JPG

thanks amazon, that prime membership is really worth having.  

Fun with radon, part 1, the unhappy spouse

If you want to keep your mate, then you must abate

Radon gas has definitely become ‘a thing’ in Calgary.  With the potential to cause fatal lung cancer, long term residences, particularly those with kids growing up inside, should be sampling.  And of course, sampling itself won’t do anything without following up and conducting the abatement, if needed.  Last year at the family Killarney SW residence, I was politely encouraged to conduct the 90 day sample.  Well, I complied, and the results came back borderline (in my view).  Around here, borderline isn’t good enough, this wasn’t surprising to me either. ‘Think of the children’ and other such comments were uttered.  As winter arrived, polite discussions on abatement degenerated into demands and deadlines.  When deadlines came and went without progress, ultimatums were issued.  That was around the time that it was agreed that I should do something about this radon problem. 

An estimate was requested by Mrs. M from local professional abatement contractor.  Your friendly builder, not one to pay retail for anything involving construction nearly choked on his beer once she shared pricing.  It was assumed (by me) that (actually my assumption was totally erroneous and sexist), being a female, her quote would be more than a male construction company owner, and that I’d surely be able to talk myself into a reasonable price for the work.  Sadly (on the ability to cut the price, not the debunked assumptions on gender based pricing on the job site) it seemed like nobody would budge, not even the second quote was remotely palatable, though I prodded them significantly to drop the price. 

And this is where the fun with radon begins…

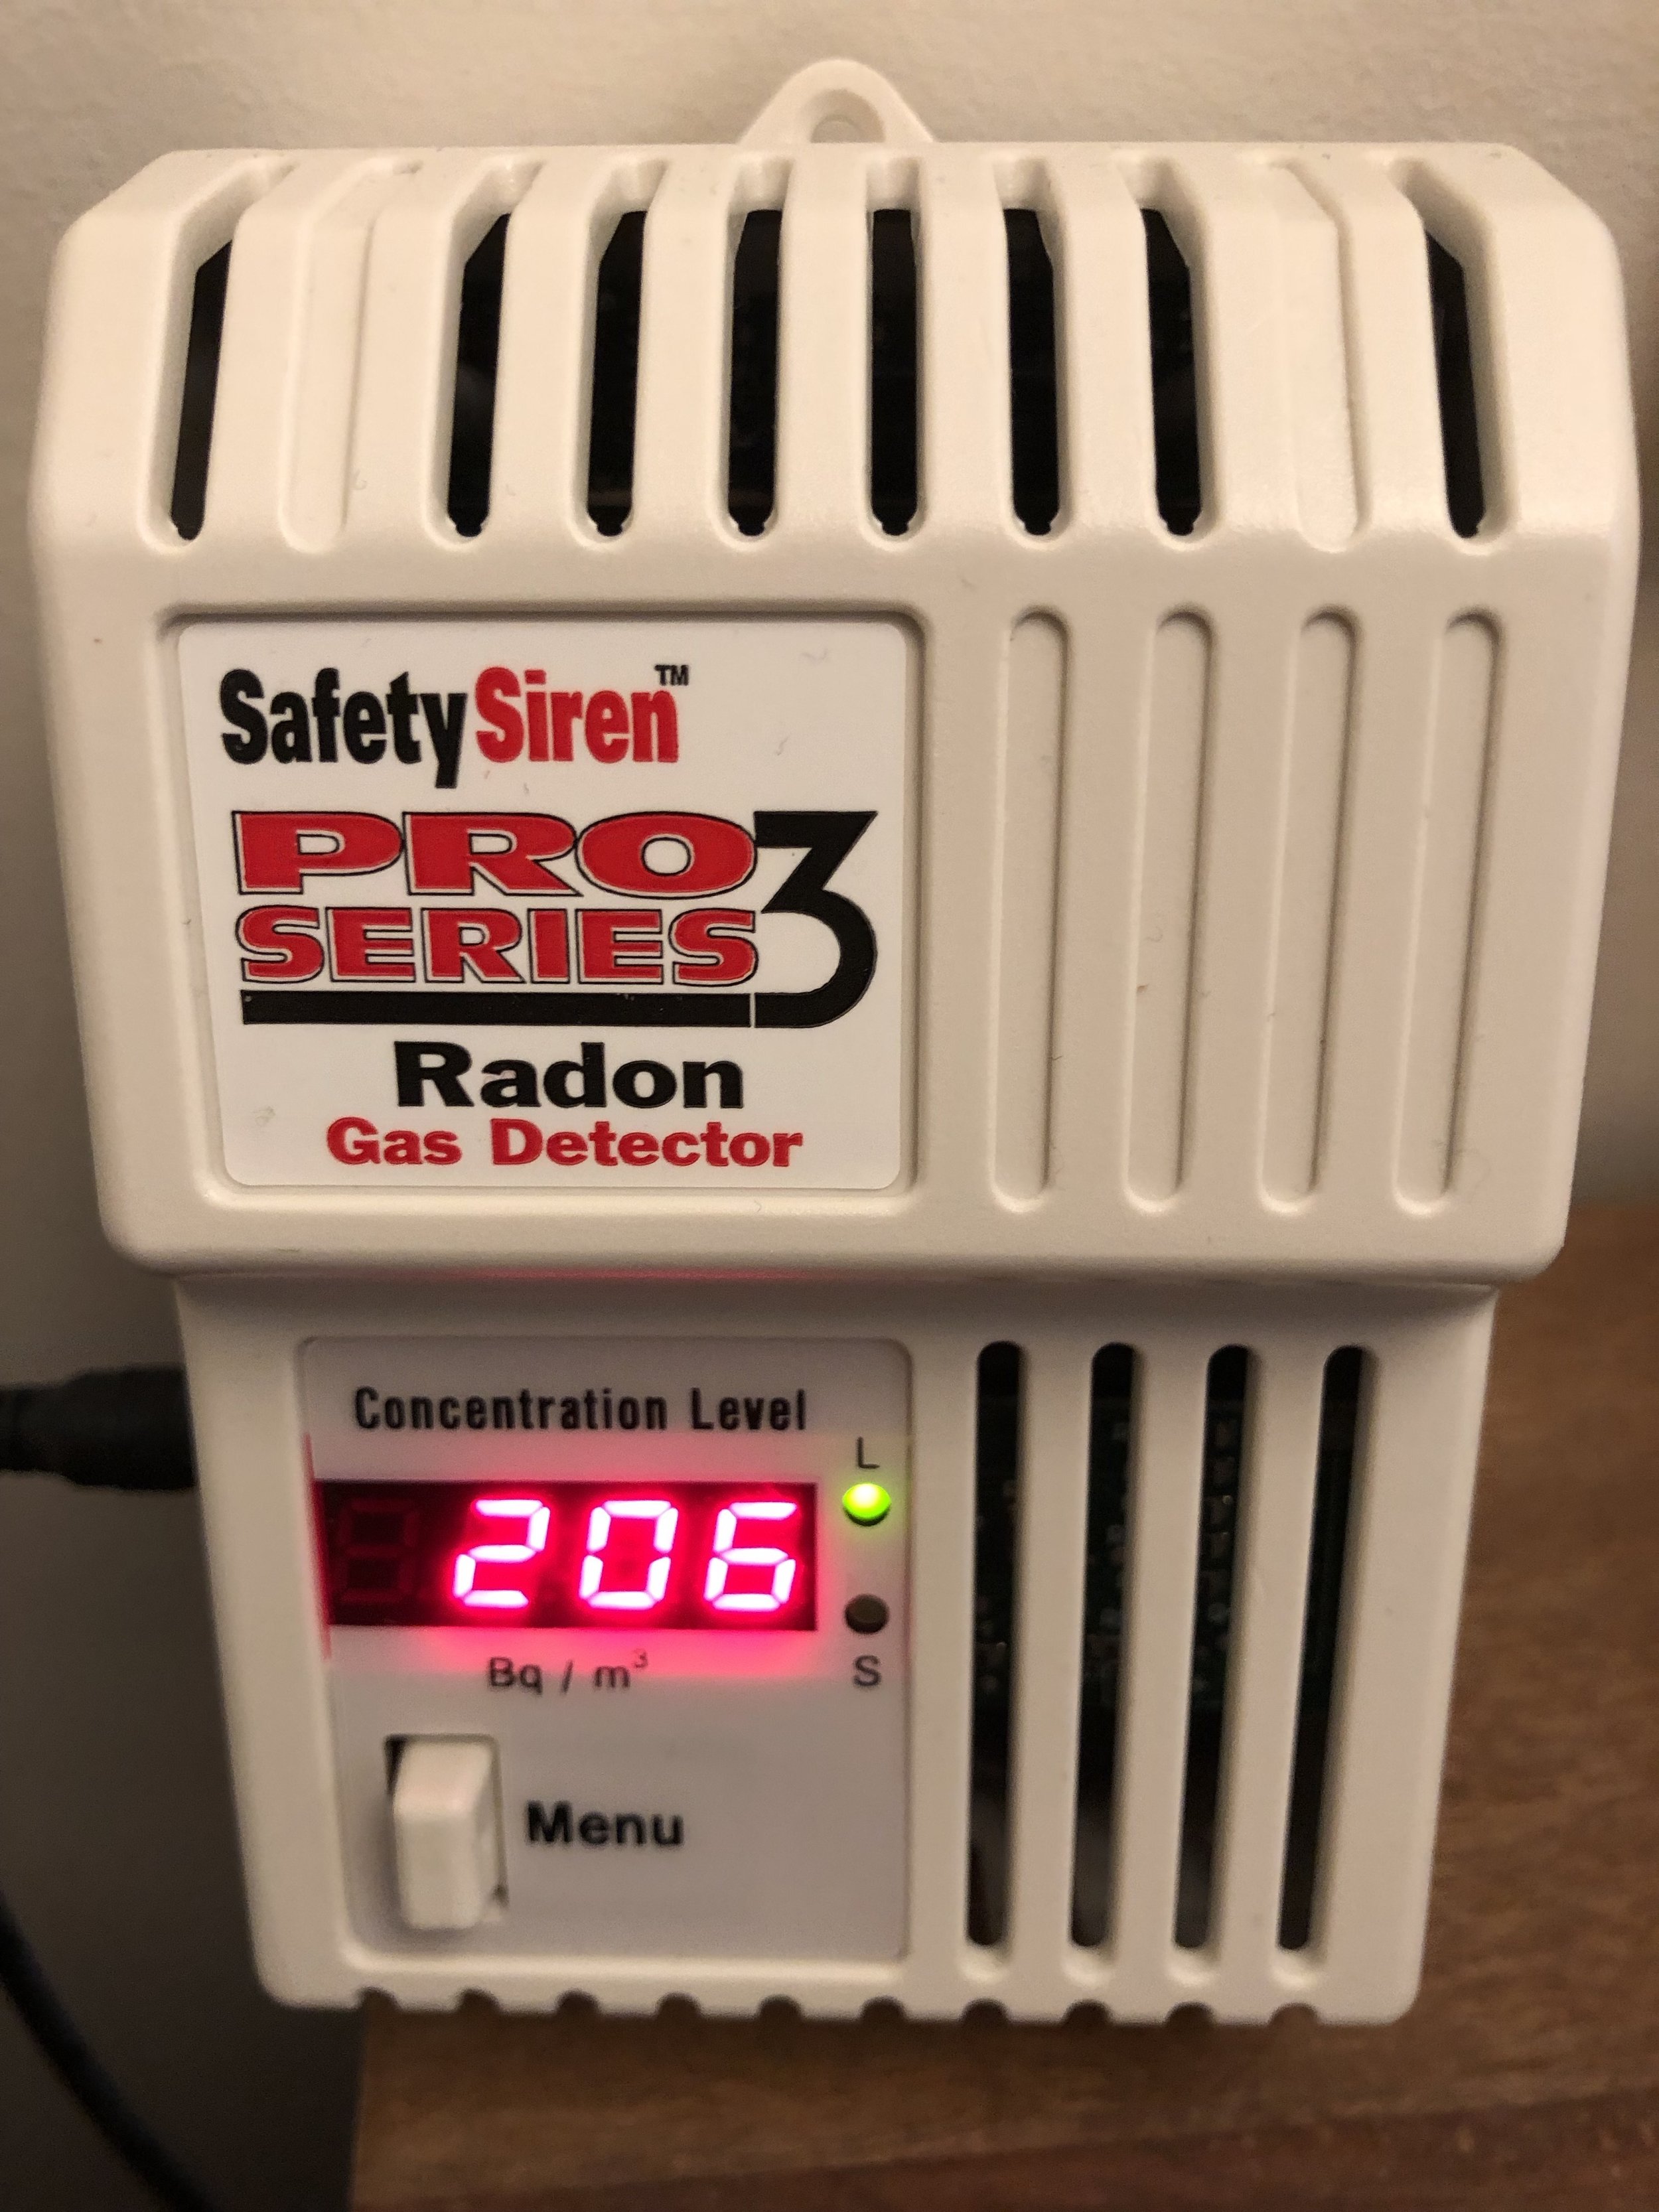
206 Bq/m3 is too high. We’d like to see this a lot lower. Watch this site for the next episode of ‘fun with radon’.

206 Bq/m3 is too high. We’d like to see this a lot lower. Watch this site for the next episode of ‘fun with radon’.

Kitchen progress.

We’ve had the cabinet boxes and gables installed.  Doors and remaining hardware can safely remain elsewhere.  At this point in the project there is too much trade damage that can occur on finishing item.   While some of this is unavoidable the amount of damage caused by either total negligence or carelessness is a real problem.   


IMAGE.JPG

This kitchen will be ready to template for countertops.  Just need to clear off all those hardwood nosings.   

Hardwood nosing assembly

The part finished interior is also functioning as a warm and well lit place to act as a worskshop for trades to prep.  Right now the hardwood guys are assembling the about 80 nosing pieces.  Sure would be nice if the factory would do this and just sell them to us in a box.  These nosings will be a nice feature of our flooring job and stair job that will start in a couple weeks.


IMAGE.JPG

Construction idiots continued - random vandals

This is the latest in an endless continuum of the random idiots that you encounter on the jobsite. The latest project hasn’t been immune to the role of idiots, these idiots seem to appear at the most inopportune moment to cause whatever grievance or harm they can manage to deliver and then they disappear.

Today the construction idiot award goes to some random individual that came off the street and entered into the unit the kitchen crew was working in. He then opened up his tool bag, grabbed a knife and proceeded to slash the fireplace exhaust pipe, essentially decapitating it, and then left as quickly as he arrived. Who was this random fart in the wind? We don’t know, we just pray his foul odour doesn’t return.

The damage left from the random idiot that entered the building and decided to slash the fireplace vent.  Who was this person, what did he want, why did he do this?  All of these questions remain unanswered.

The damage left from the random idiot that entered the building and decided to slash the fireplace vent. Who was this person, what did he want, why did he do this? All of these questions remain unanswered.

Interior door and trim spray lacquer

the painter continues to make progress in the first unit at the Richmond project.  The doors are all sprayed and the closets and trim will be up next.  The lacquer results in a spectacular smooth and durable finish but breathing protection is needed to apply it.  Worth the effort and hazard?  I’m not sure. 


IMAGE.JPG

The entire house is now a spray booth.  Another few days and we will move on to the next stage of the project.  

IMAGE.JPG

Closet work.  


IMAGE.JPG

And more closet work. This is a lot of effort and labor to complete.